Ice Poles & Ice Pikes
Why Ice Poles?
Of all the specialized gear items available to Nordic ice skaters, ice poles and pikes are the most important. They’re the ‘ounce of prevention’ that keeps us from falling through the ice. They’re the ‘magic wands’ that allow us to measure the strength (NOT thickness) of the ice and navigate safely through a maze of weak and strong ice without making a misstep.
An ice pole looks a lot like a ski pole that’s missing a basket. A wooden ice pike, on the other hand, has its own unique appearance. Examples are in the photos on the below right.
Upon closer inspection you’ll notice a few more differences:
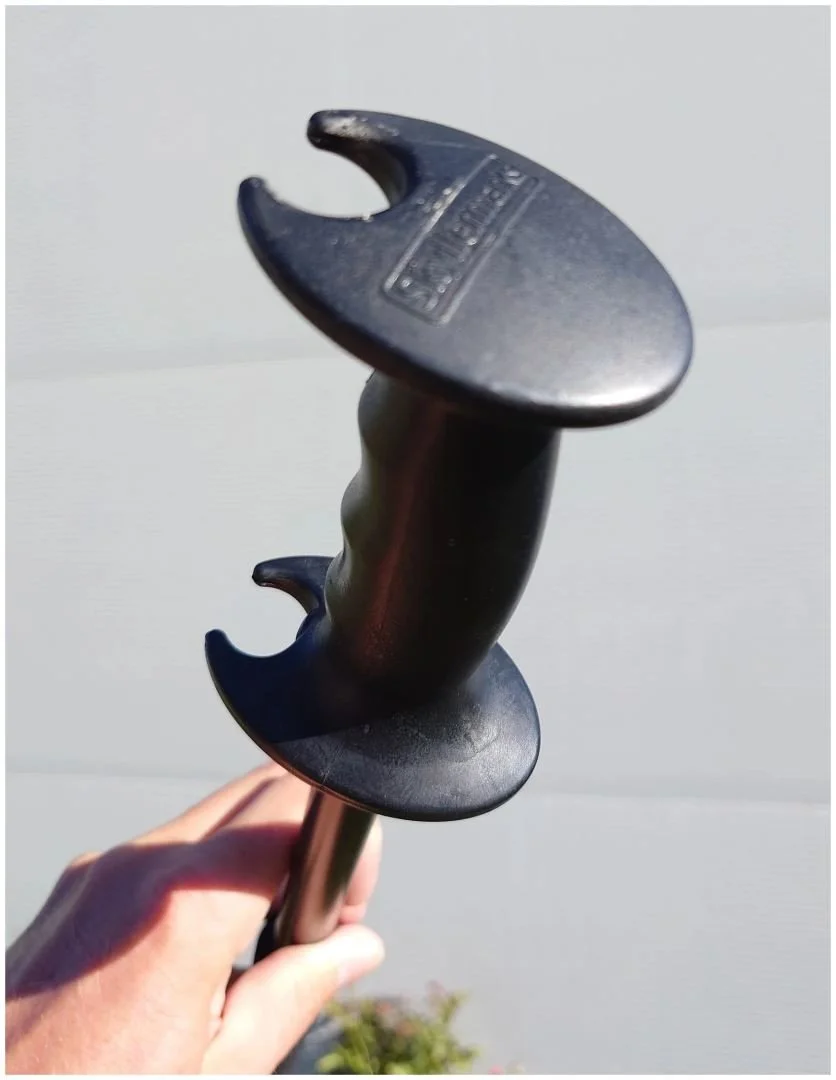
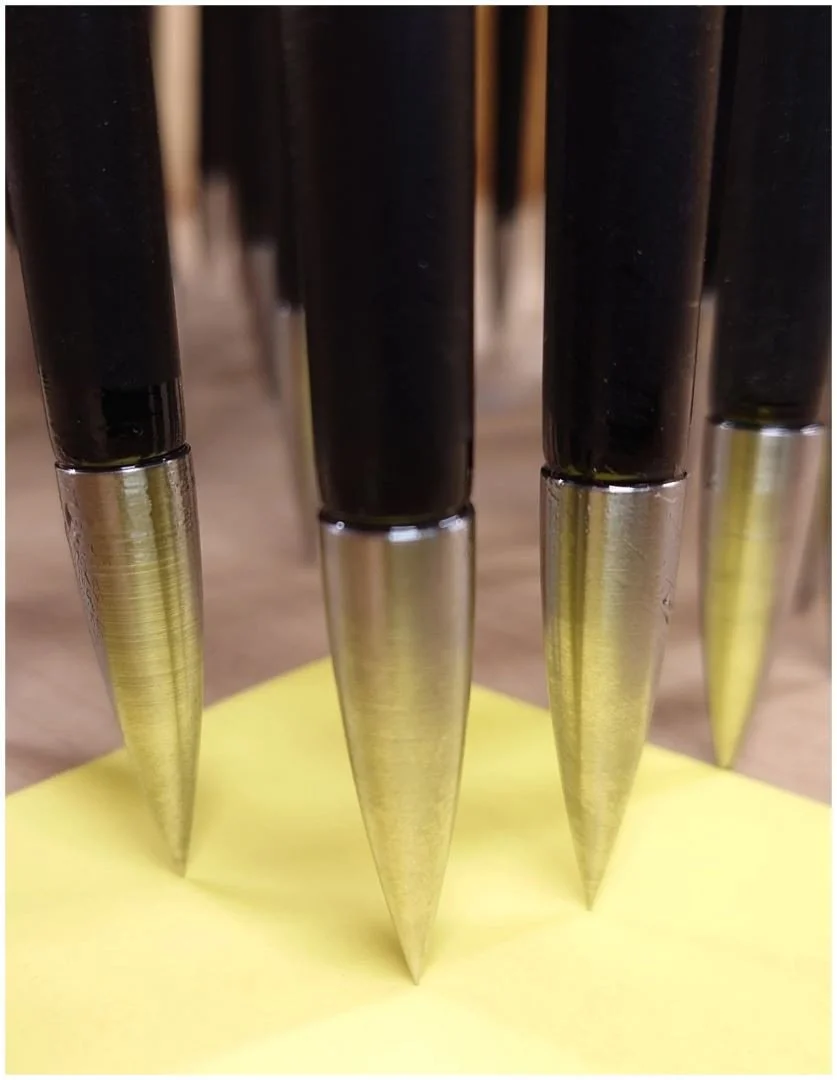
(a) An ice pole has a hardened steel tip designed for penetrating ice. Unlike a ski pole, an ice pole or pike won’t slip on hard, smooth ice.
(b) An ice pole shaft is made of aluminum (or wood), not fiberglass or carbon fiber, so it can withstand the impact of stabbing it into the ice with all your strength.
(c) There’s no wrist strap, so you can toss your ice pole aside if you start to fall.
(d) The best ice poles have a special grip with a bottom flange that prevents your hand from slipping during your downward thrust.
What length poles to get?
Many skaters end up with ice poles that are way too long for them. Once they figure it out, they have to sell their poles and buy a shorter pair. Otherwise they’re stuck with the wrong size forever.
I recommend sizing ice poles like back-country ski poles. When you’re standing in your skates on the ice, they should come up into your armpits, no higher. This will give you plenty of length for keeping your balance and pushing yourself along. Shorter poles also weigh less and have a lower ‘swing weight’. Most importantly, if you need to test the ice, a short pole is just easier to thrust straight down into the ice without having to lift it way over your head beforehand.
Here’s my pole sizing chart:
5’0” and shorter - 120cm
5'1" to 5’4” - 125cm
5'5" to 5'8" - 135cm
5'9" to 6'0" - 145cm
6'1" to 6’4” - 155cm
6’5” and taller - 165cm
I'm 5'9". I use 160cm skate-skiing poles and 150cm classic ski poles. But for ice skating, I use 145cm poles.
My wife is 5'3". She uses 145cm skate-skiing poles and 135cm classic ski poles. But for ice skating, she uses 125's.
My favorite ice testing poles are made in Sweden by Skyllermarks. (See photos on the right.) Their poles are lightweight and indestructible. The grips are specifically designed for ice testing, while most other manufacturers use generic ski-pole grips. Skyllermarks poles come in three color choices: black, blue and orange. Blue poles are $100/pair. (Only a few pairs left!) Orange poles and black poles are $150/pair. Custom lengths from 120cm to 145cm. If you need help finding the right poles, feel free to get in touch at nordicskate@gmail.com.
How do you test the ice?
The basic test is to hold the pole a safe distance away from your feet, raise it above your shoulder, and then stab it straight down into the ice with all your strength. You must stab it straight down, not at an angle, to get an accurate result. Then, if you’ve never used an ice pole before, you’ll need to ‘calibrate’ your pole based on your body weight, arm strength, and the experience of other skaters.
For example, I’m 5’10”, 155 lbs., and I have decent arm strength. I can penetrate two inches of cold, hard black ice with a single poke. I call this ‘one-poke ice’ and I avoid it, because it tends to make disconcerting cracking noises underfoot and it just doesn’t give me enough of a safety margin. On the other hand, with your pole or pike maybe you can penetrate three inches, or maybe just an inch. The only way to find out how our pokes compare is if we both poke the exact same ice at the exact same time and compare our results.
The number of pokes needed to penetrate cold (sub-freezing) black ice and hit the water underneath goes up exponentially as the ice thickens and strengthens.
Here’s a strength/thickness table based on my arm strength and my ice poles. IMPORTANT: This sample table applies only to black ice at subfreezing temperatures tested with Skyllermarks ice poles. If the ice isn’t black, or if the temp is above freezing, ignore this table, and make your own table based on your arm strength and your ice pole.
1 poke = 2 inches of black ice at subfreezing temps
2 pokes = 2.5 inches
4 pokes = 3 inches
8 pokes = 3.5 inches
16 pokes = 4 inches
32 pokes = 4.5 inches (my shoulder is aching before I get to this point)
Once you’ve poked the ice, if you got all the way through, you can stick a Skyllermarks J-hook through the hole you made and measure the ice thickness. But I can’t emphasize this enough, the crucial measurement is ice strength (number of pokes), not thickness (number of inches).
Testing Gray Ice
Gray and white ice are much softer than black ice, because of their higher air bubble content. And gray ice usually consists of multiple layers of varying densities. It’s impossible to gauge the thickness of gray ice by counting pokes, so all you’ll get is a measurement of ice strength relative to X number of inches of black ice. And since you can’t see into the ice, it’s hard to know where to poke aggressively, and where to take it easy. Unless you’ve been observing the lake all winter long and you already know where the thicker and thinner areas are, you’ll have to poke the entire lake to feel safe. There may be a foot of ice at one end of the lake, and only an inch of ice at the other end, but your ice pole will help you tell the difference.
Testing Sandwich Ice
Ice poles and pikes are useful for probing ‘sandwich ice’ - a layer of water or slush trapped between two layers of ice. If you poke and hit a solid subsurface ice layer, but water oozes up through the hole you’ve made, chances are you’ve penetrated a trapped layer of water or slush. Sandwich ice can be a serious trip-and-fall hazard, so proceed with caution, or turn around.
Ice Poles vs. Ice Pikes: Pros and cons
It was February 1999. I was skating on Lake Mälaren in Sweden with my Dutch friend Arjen. Two Swedish skaters, Kristian and Ylva, appeared in the distance traveling in the opposite direction, and as if we all felt the pull of some magnetic field, our paths converged.
I took a group photo (top of page). It was a study in contrasts, and I’m not just talking about wardrobes. Their skates ranged from Ylva’s ancient wooden skates with crisscrossed leather straps (center), to Kristian’s ‘modern’ aluminum-deck skates matched up with leather telemark boots (left), to Arjen’s ‘ultramodern’ (at the time) Salomon skate boots and Nordic skates (right).
But what about their poles? Why was Kristian carrying just one pole instead of two? And why was his one pole so big, tall and heavy?
Centuries ago, when skate blades were made of animal bones instead of steel (which hadn’t been invented yet), and they had no edges to push off with, the only means of propulsion was a stout wooden ‘pike’ with a forged iron tip, with which you pushed backwards to propel yourself forward. The iron tip could also be used to test the strength of the ice.
Nowadays we have access to modern materials. A pair of ice poles with ergonomic grips, aluminum shafts and hardened steel tips is not only lighter in weight than a single ice pike - but also much more versatile.
You can test the ice with either a pike or a pole. But look at all the things you can do with a pair of ice poles that you just can’t do with an ice pike:
1. Keeping your balance and momentum on bumpy or snow-covered ice
2. Skating into a headwind
3. Double-poling across ice that has become too soft to skate on
4. Keeping your balance sidestepping a pressure ridge or an open crack
5. Crossing jumbled chunks of 'pack ice'
6. Getting an upper-body workout instead of letting your arms hang useless
7. If you break a skate, double-poling back to shore, gliding on your one remaining usable skate and using your poles like crutshces
And here are the advantages of an ice pike:
1. It makes you look traditional, ‘old school’.
2. If it’s made from a carefully selected piece of hardwood, it’s a work of art.
3. It’s heavier, so it can give you more ‘oomph’ when stabbing the ice - unless your hand slips down the shaft on impact.
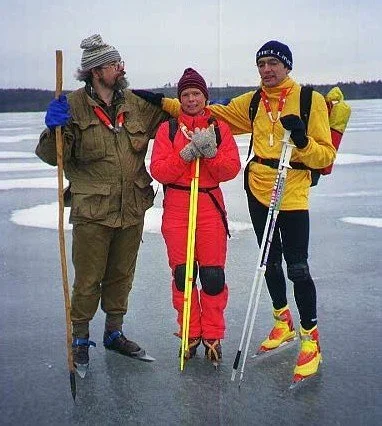
Above: Kristian, Ylva and Arjen on Lake Mälaren in Sweden. Kristian is holding a traditional wooden ice pike, while Ylva and Arjen have modern ice poles.
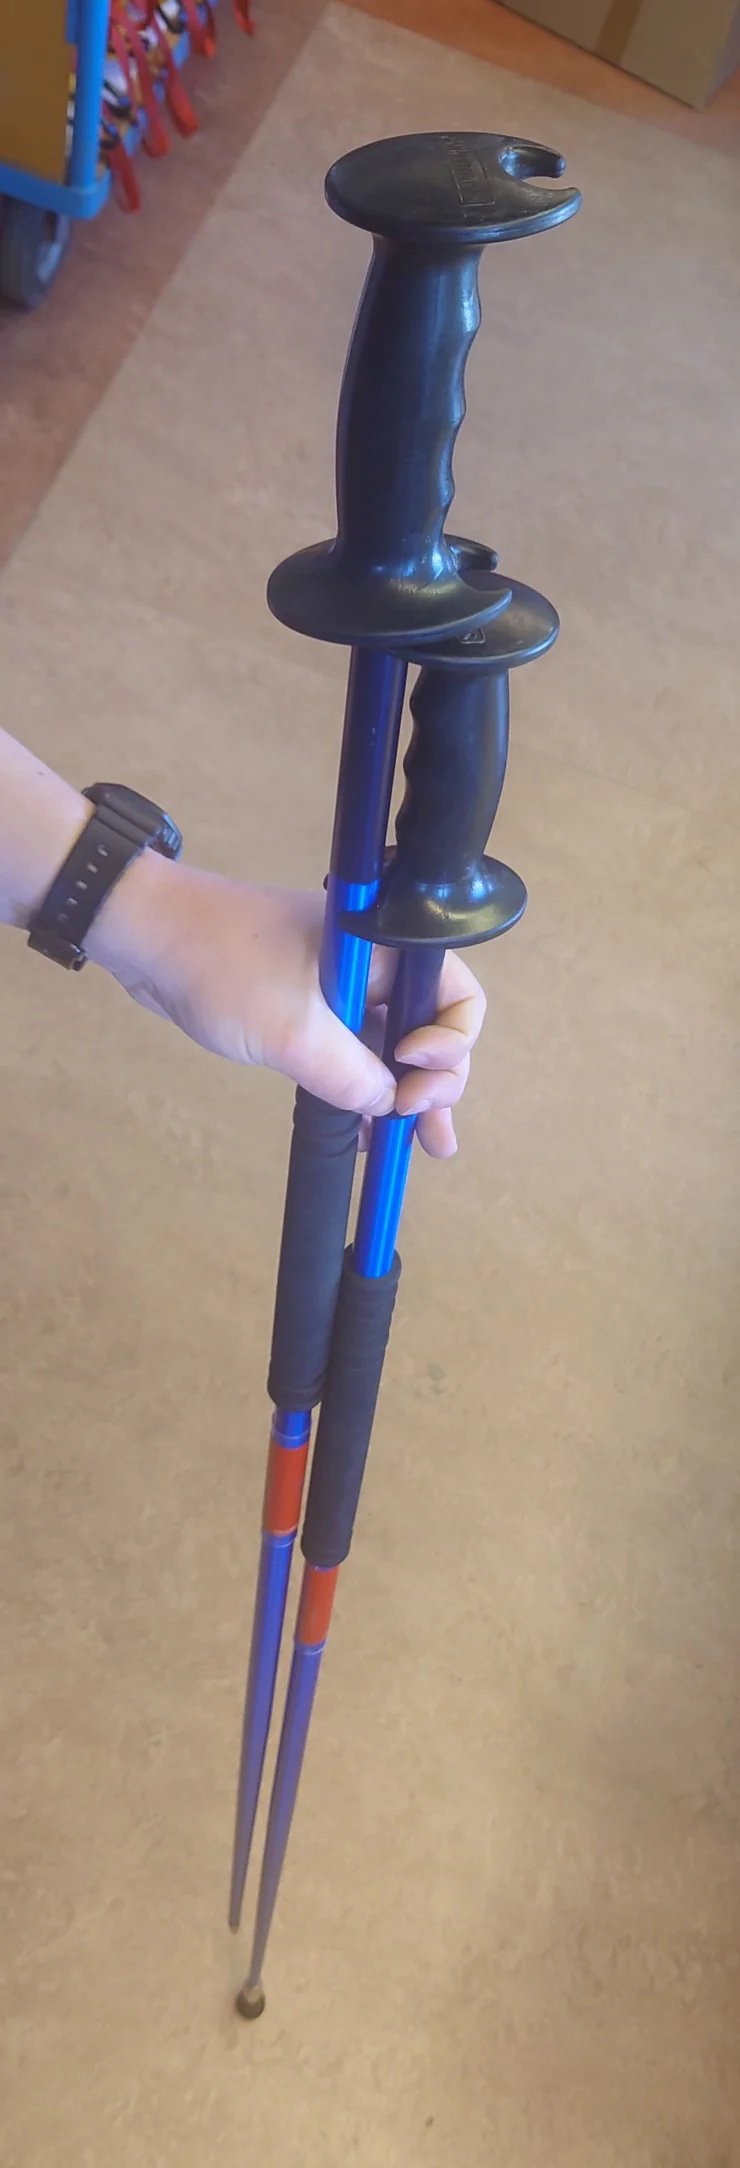
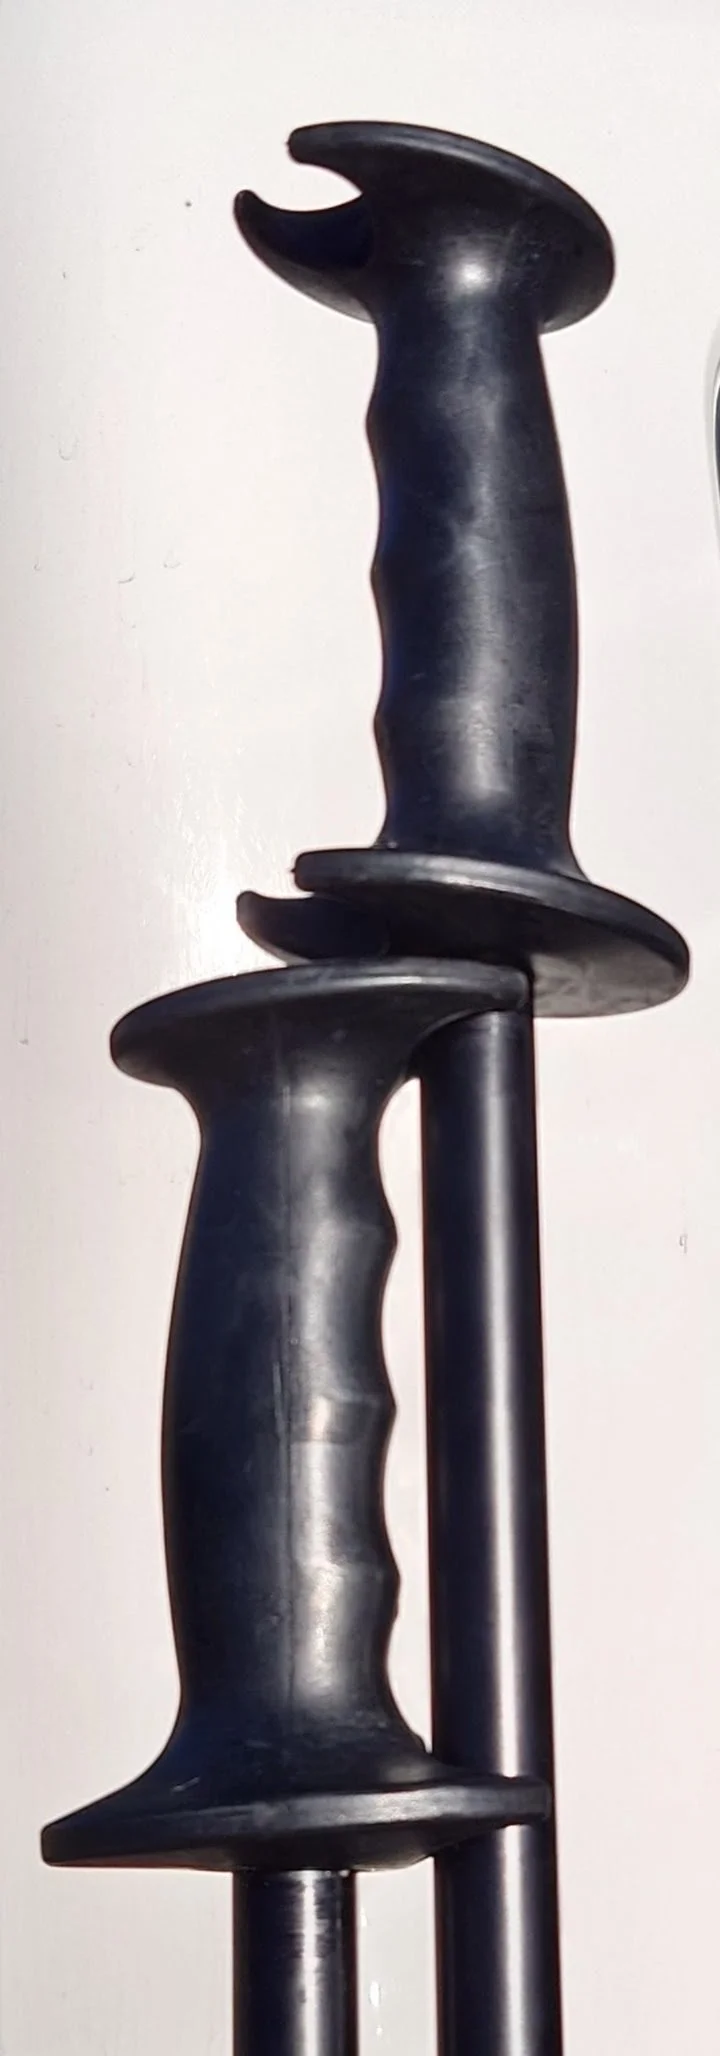
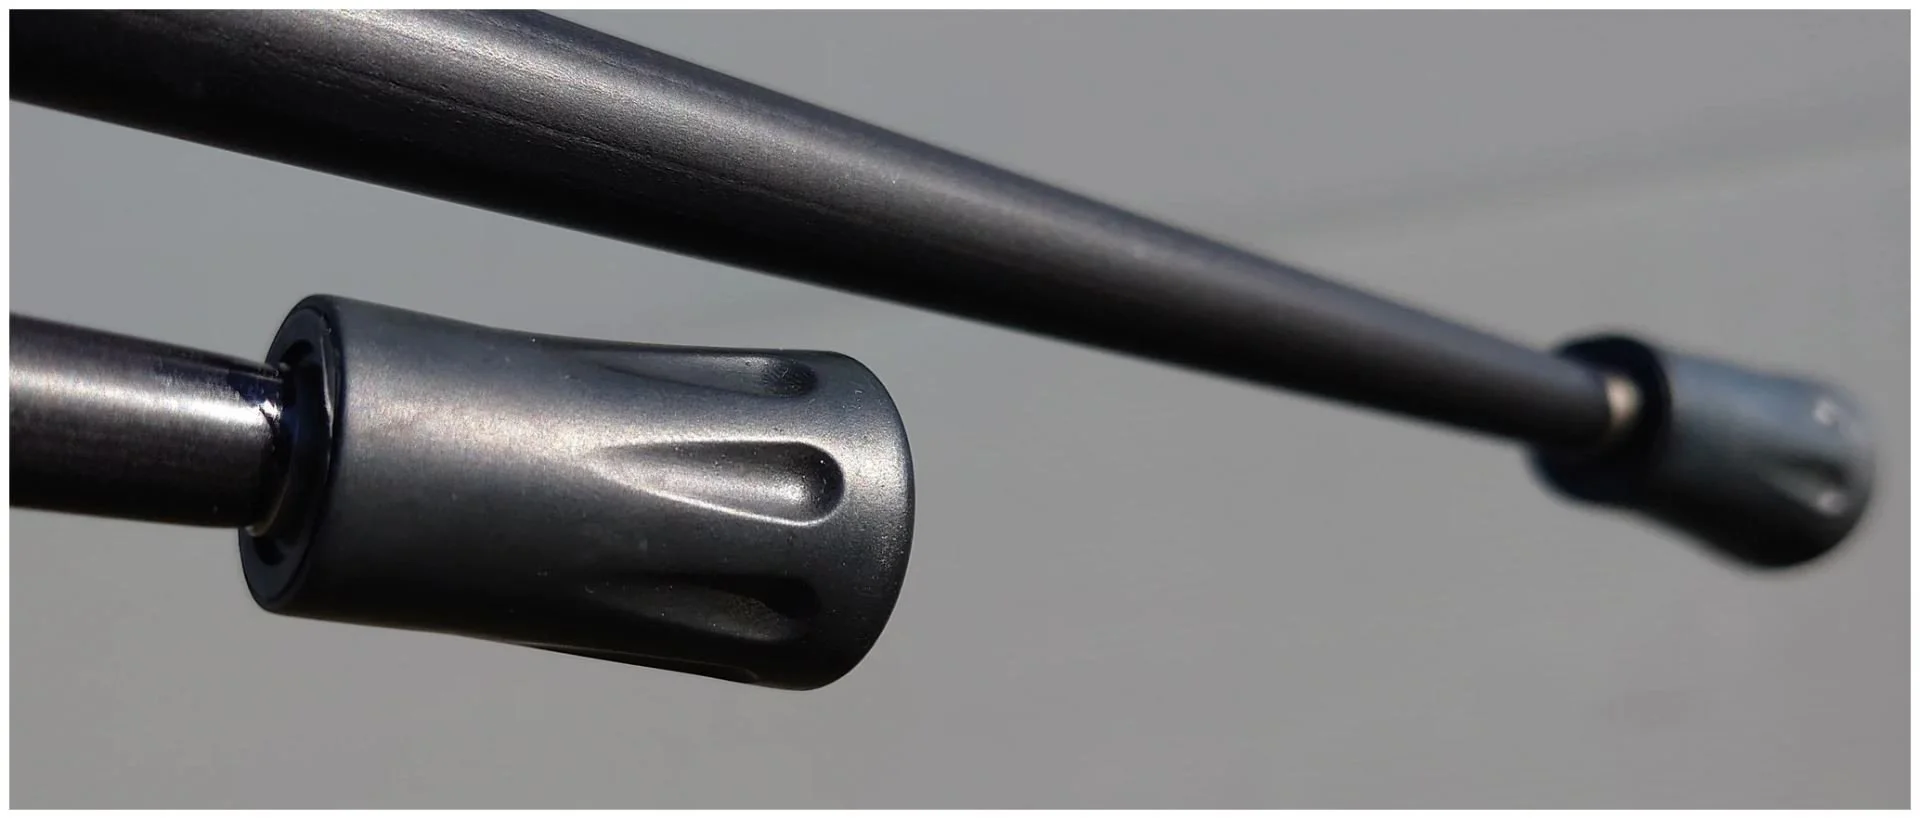
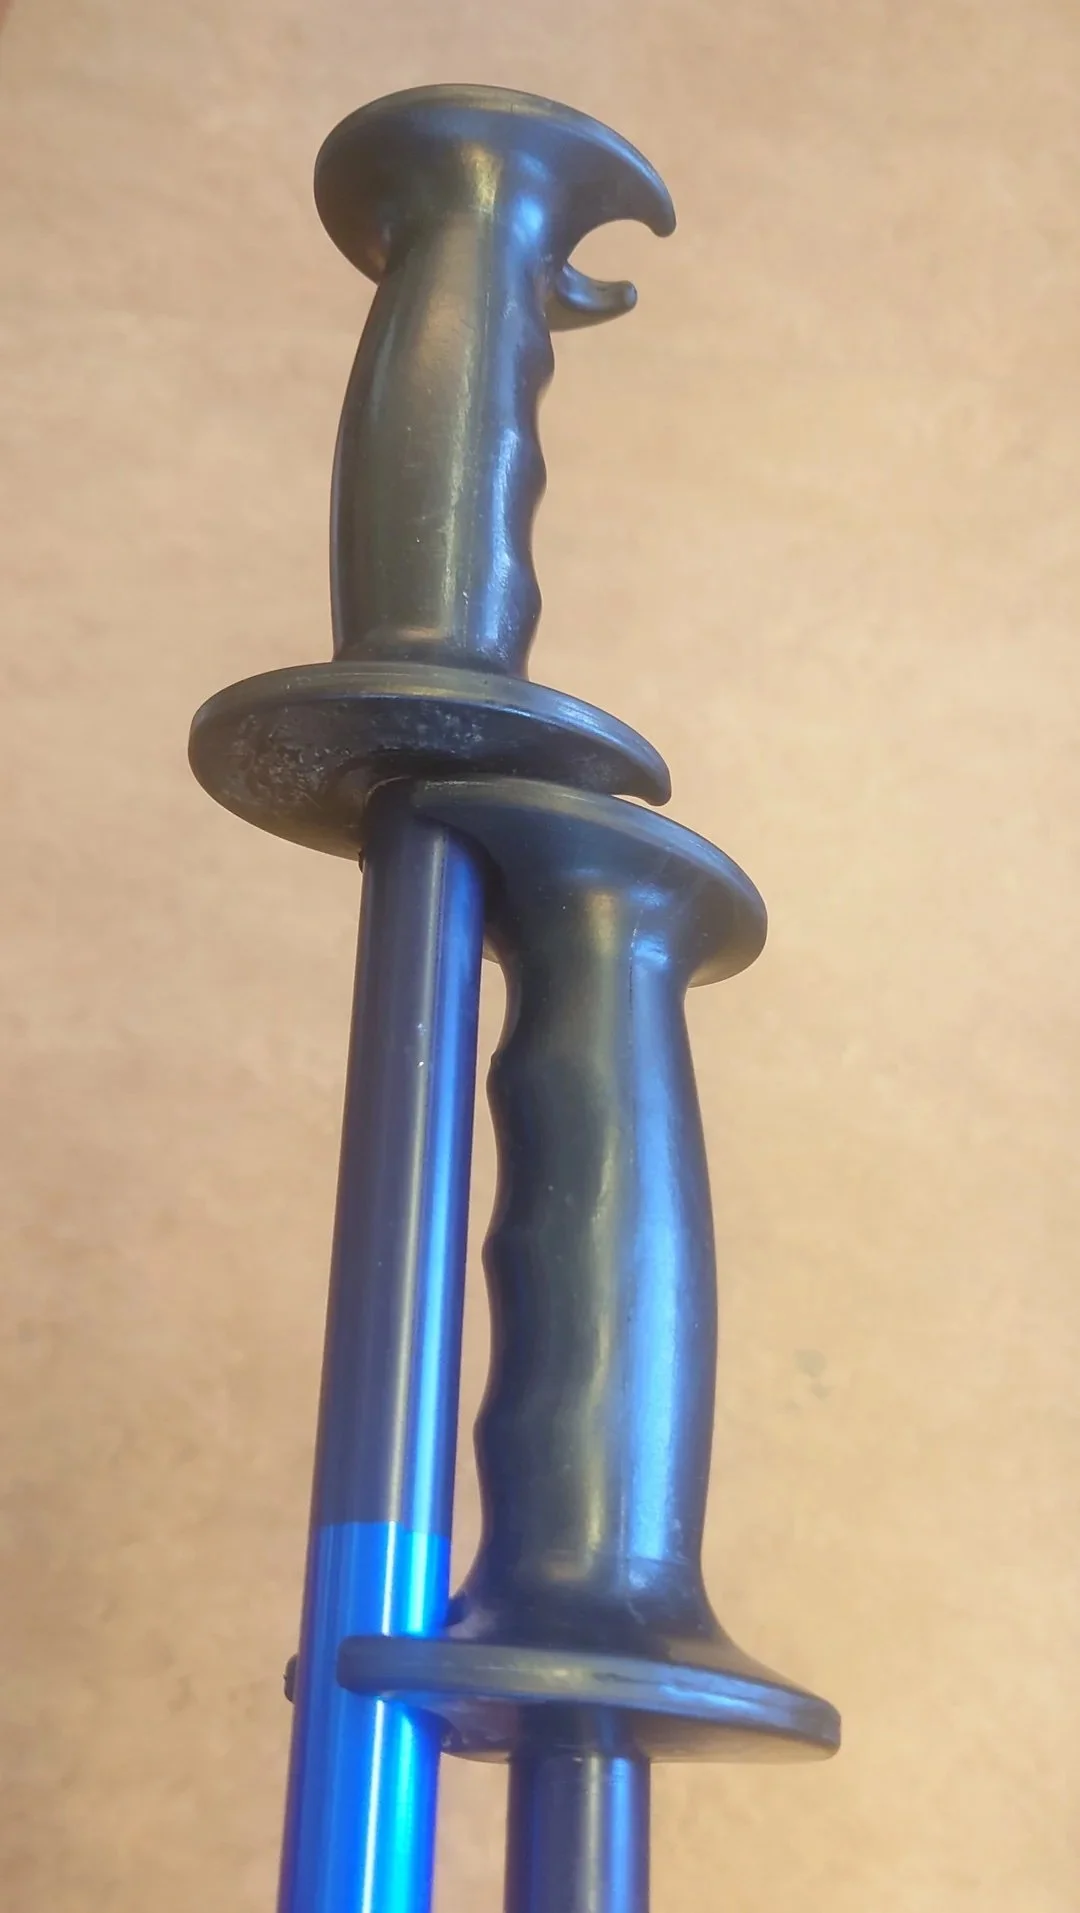
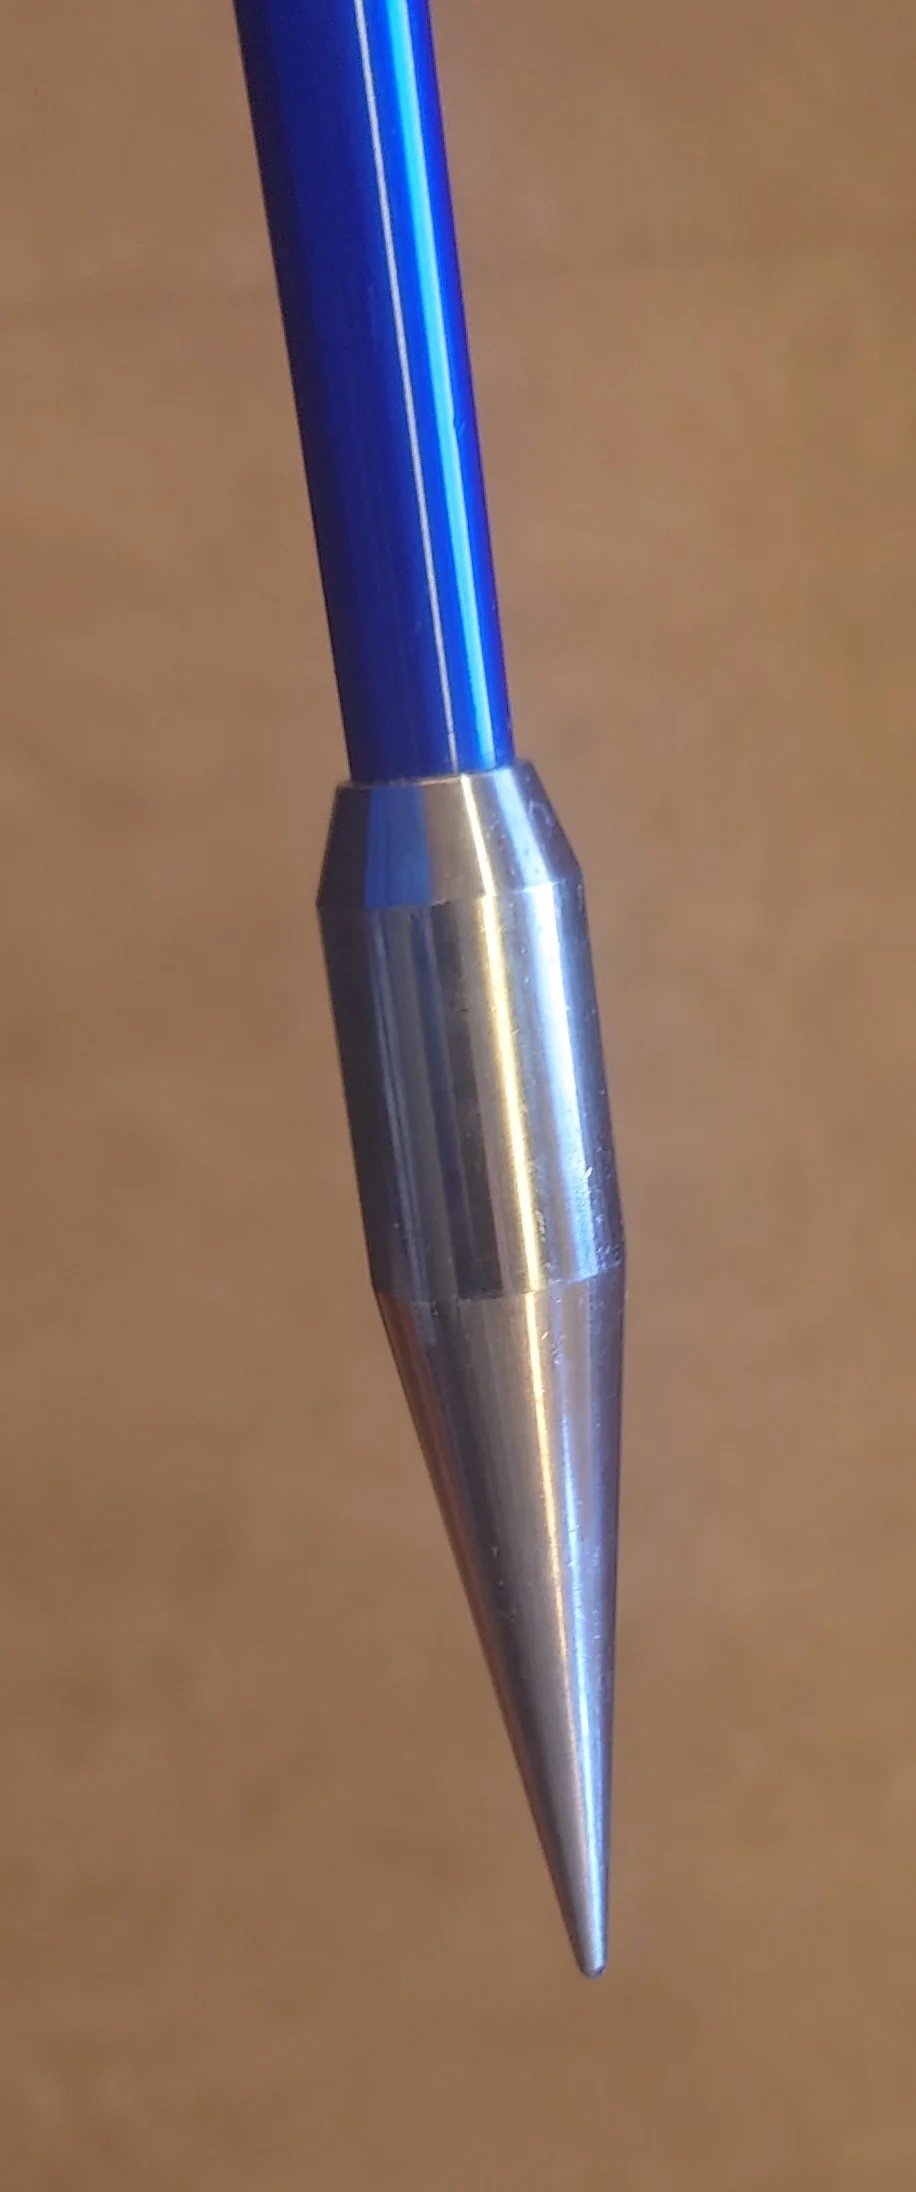
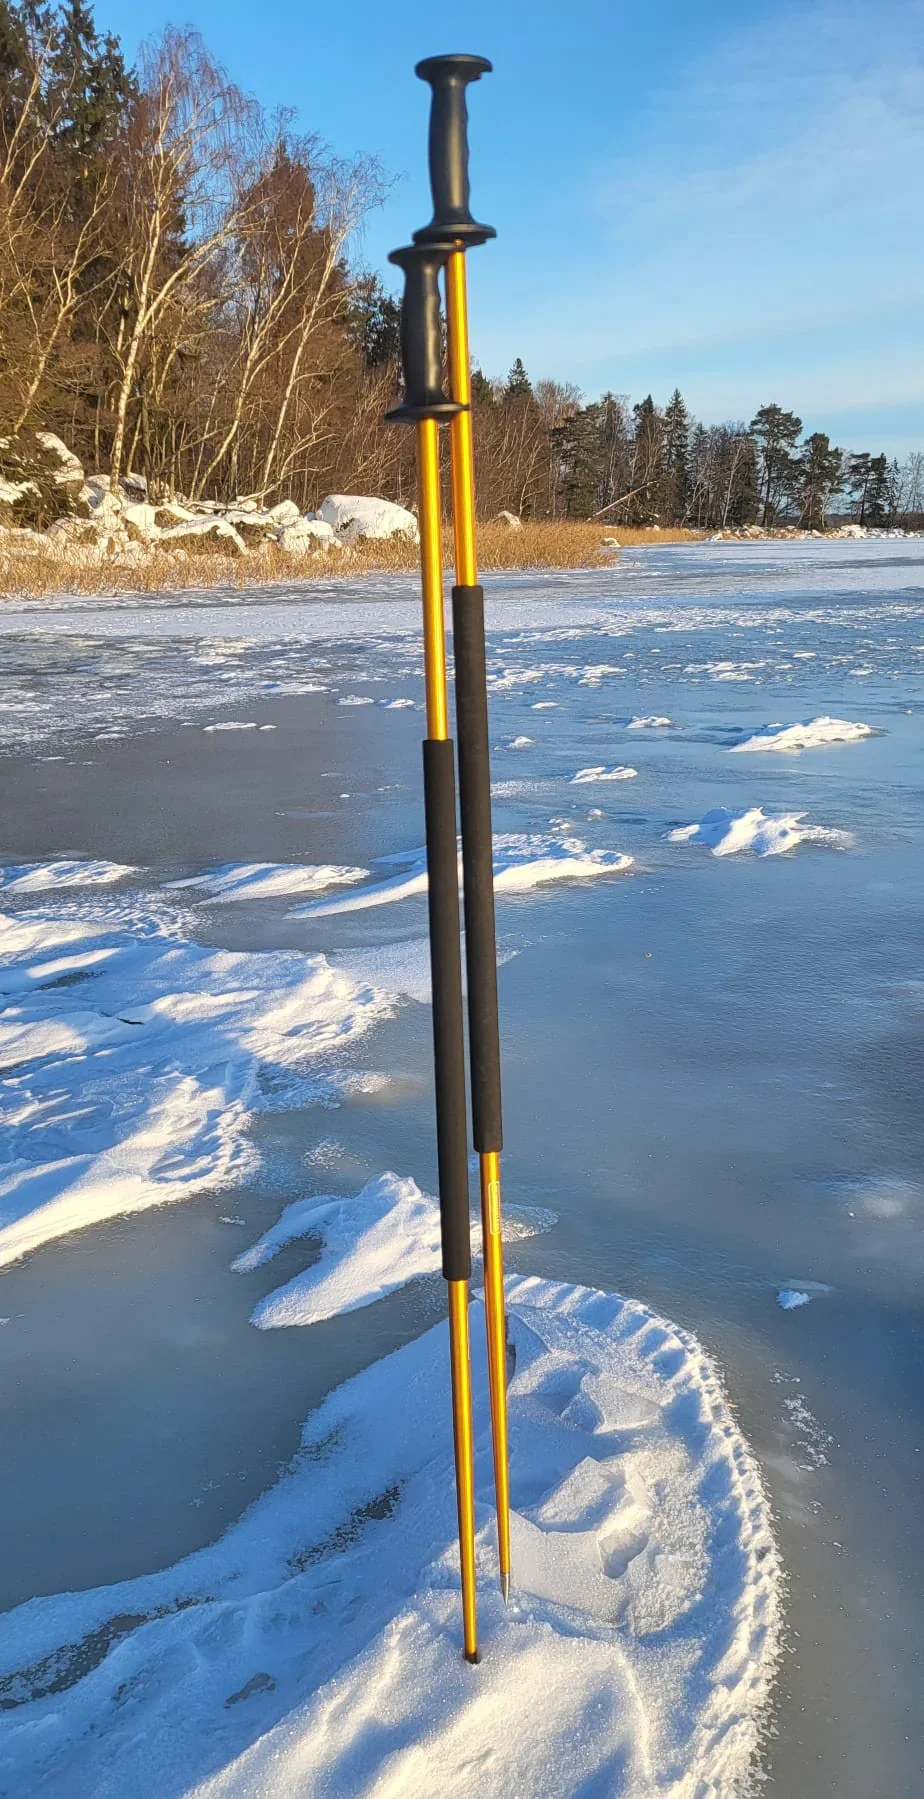

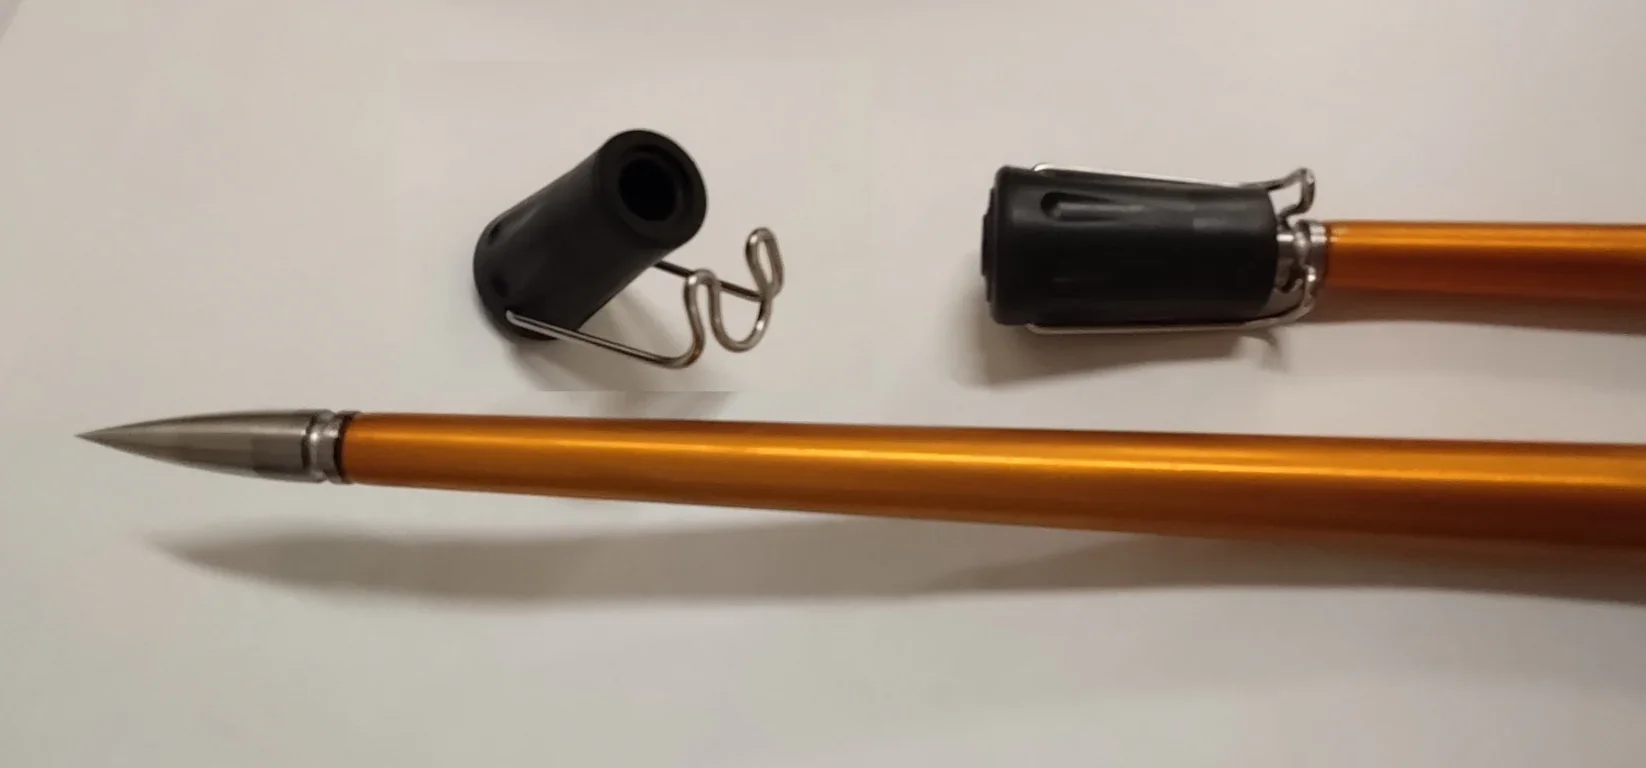
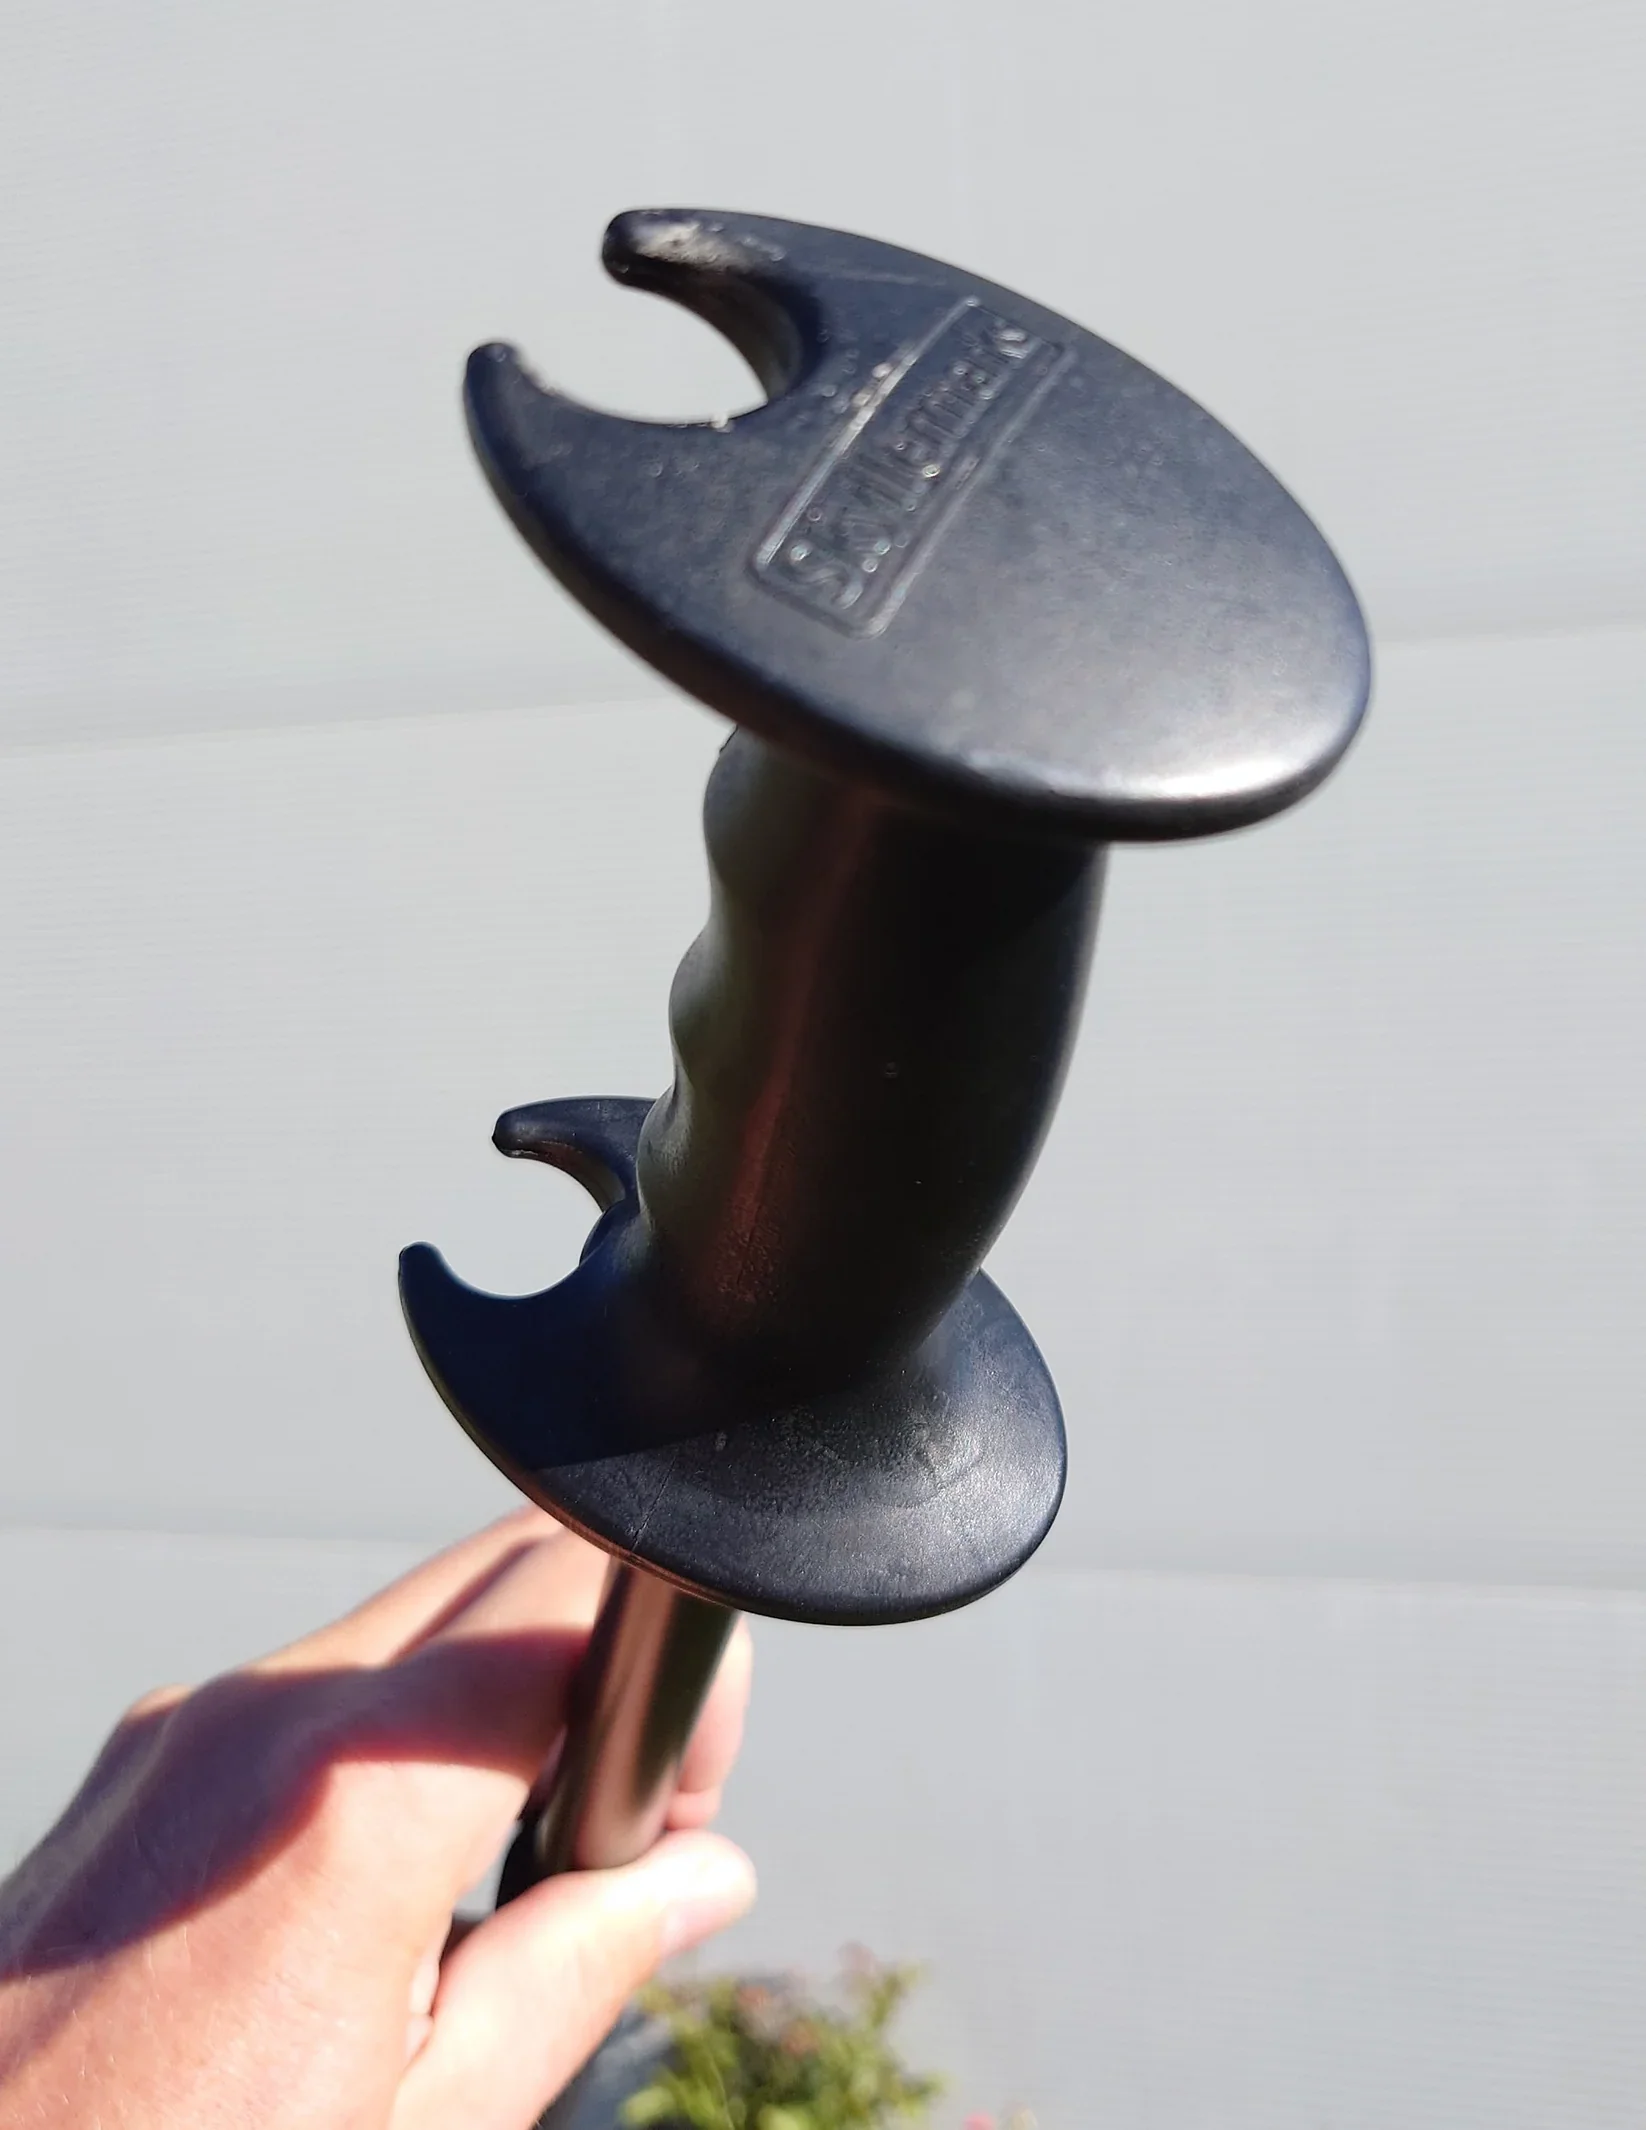
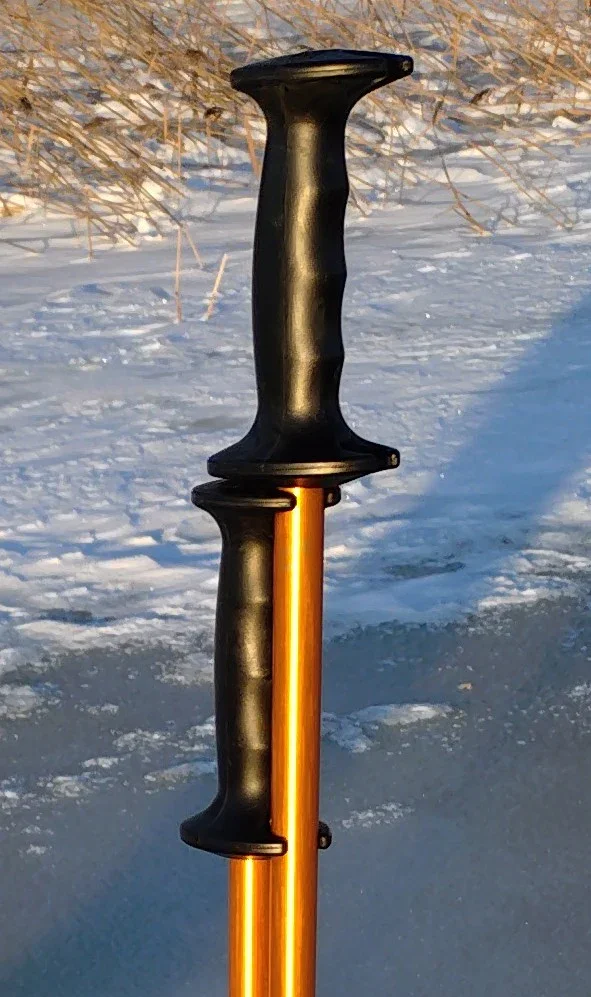
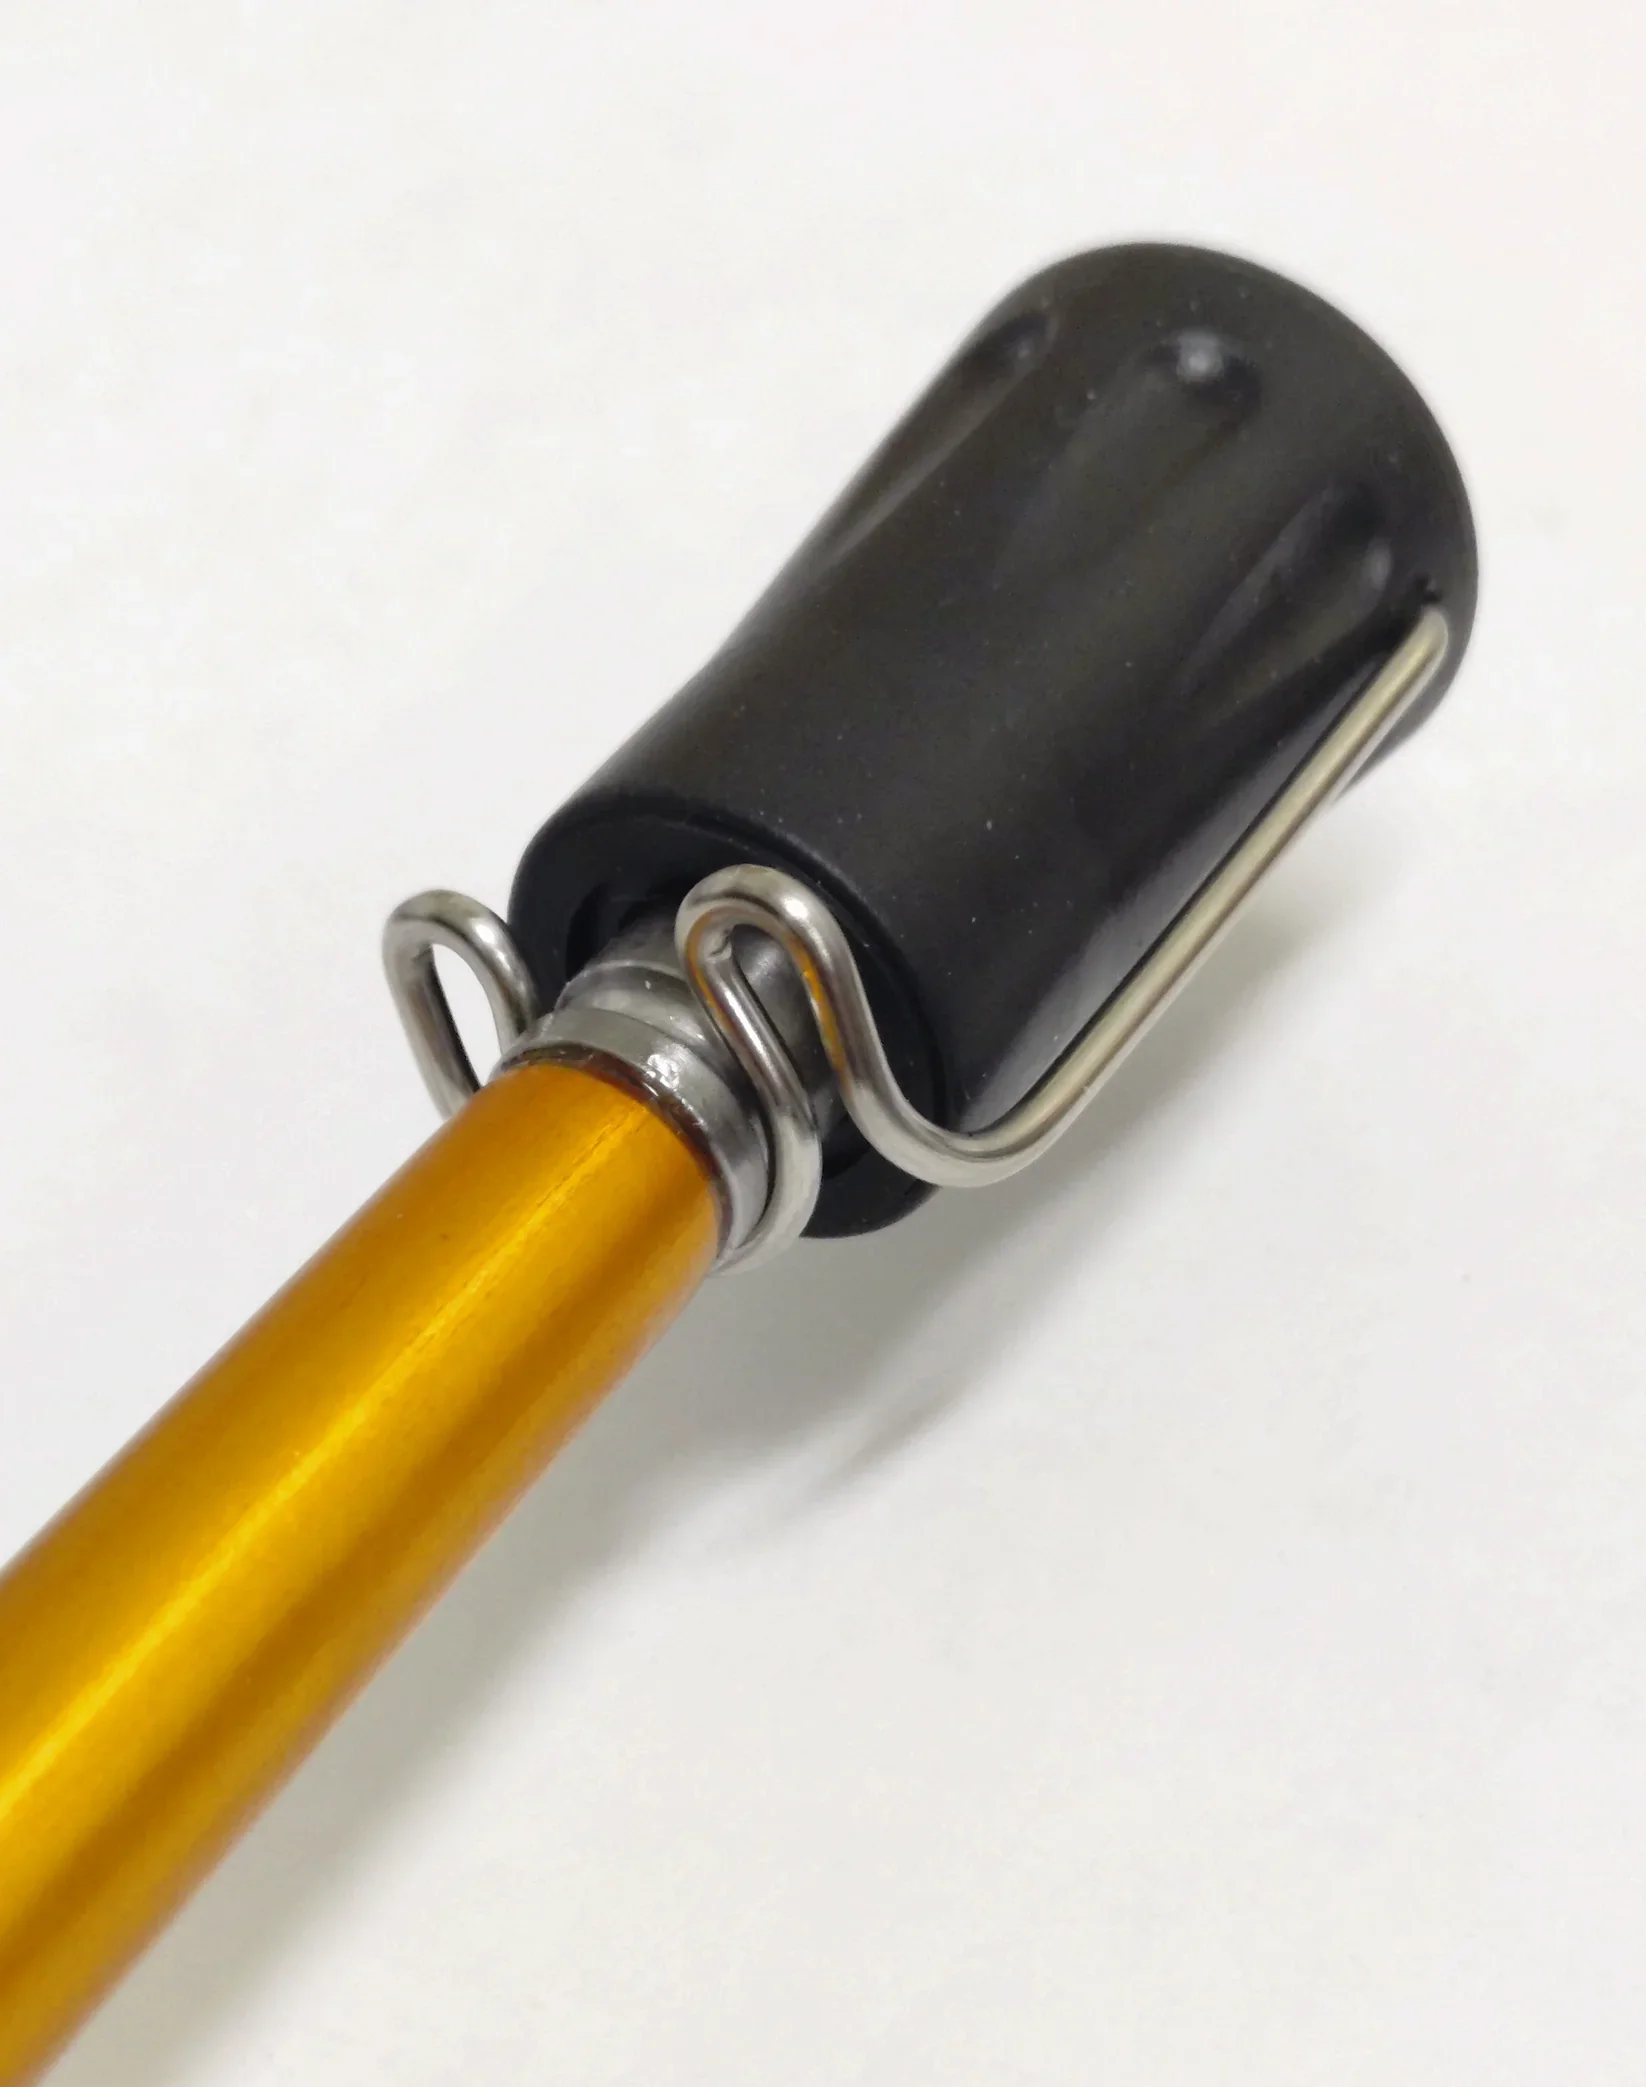
Below: Skyllermarks ice poles. Grips are specifically designed for ice testing - unlike ski pole grips. The bottom flange on the Skyllermarks grip keeps your hand from slipping down when you thrust your pole into the ice. The rugged aluminum shafts don’t bend or break, and the steel tips stay sharp for 20 years or more. The shaft is wrapped in an extra-long foam sleeve that cushions you and insulates you from the cold aluminum when you’re carrying the poles under your arm.
Color choices: Black, blue, orange.